Sunday, August 26, 2007

Grandma Erna's Potato Soup

My grandma Erna makes the best potato soup. So I took the recipe from her.
I cook to feed a small army all the time and I think most of you can figure out proportions on your own. You're all grown. lol
First you need about this much potatoes, peeled, cleaned and chopped.
SANY0089

I cook my bacon a little to render most of the fat out.
SANY0090

I use a big pot for my soup because I have a large family
SANY0091

This is two onions, diced
SANY0092

While my onions and potatoes were boiling, I chopped two celery hearts. I let the potatoes and onions boil until the potatoes were just tender and then I tossed in the celery and bacon.
Then I added a can of evaporated milk.
SANY0098

I let it all boil until the potatoes were tender all the way through.

Here is the end result.

SANY0099

YUMMY...now go to the store, buy the crap you need to make some, and tell me how it was.

Monday, August 20, 2007

Damper

Damper, it's an Aussie thing

We don't cook it on the BBQ but in a camp fire

I found a site about it


Roubourne
Aboriginal School


Image
3
cups of plain flour


Image 3
teaspoons of baking powder


Image Corn


Image Onions


Image
Water

Step
one :Build a fire in a clear area.


Damper Fire


Mix Ingredients


Add baking powder Mix ingredients


make into balls


Image


Place in fire

Image
Image

Cook for about 30 minutes and eat
with honey and or butter

Image

Eat
enjoying damper

Monday, August 13, 2007

Fruit Roll-ups


Sorry this took a while for me to get around to. I have not made these yet. Maybe when my grand daughter is older we will make them together. Sure looks like a fun thing to do with children.

~~~~~~~~~~~~~~~~~~~~~~~~~~~~

Fruit RollupsCopyright 2001 by Kathryn Martinez


Making your own fruit roll ups is easier than you would think. Fruit Roll-Ups is actually a commercial name for a disappearing practice of food preservation called fruit leather. You might ask, if I can save time and energy by buying them ready made in the store why bother?
The answer is that most fruit leathers that you buy in the store are more candy than anything else and have very little nutritional value. You can change that by making your own. It’s a great activity for using with a study on pioneering or nutrition, a way to avoid the junk food habit, or a simple trail snack for your nature hikes … or maybe your just looking for a way to use up that over ripe fruit.

SUPPLIES:
Fresh, canned, or frozen fruitBlenderNon-stick baking sheets*Non-stick baking spray (e.g. PAM is a commercial brand)


DIRECTIONS:
1. Wash and prepare fruit.
2. Puree fruit in blender until it is very smooth. To make a leather that is 18 inches x 14 inches x ¼ inches, you will need about two and a half cups of puree.
3. Add as little water or juice as possible when pureeing.
4. You may now add any sweetening or spices … but beware, the more liquid in your puree, the longer it will take to dry. You don’t have to use processed sugar for sweetening; try honey, cane syrup, molasses, maple syrup, brown sugar, etc. (See below for more ideas on flavorings and spices).
5. Lightly spray the baking sheet with non-stick spray.
6. Pour the puree onto the prepared sheet.. Slightly tilt the tray to spread the puree around evenly. You could also make 4 to 6 inch size pancake shapes instead of one huge sheet.
7. At this point, you make garnish your leather if you desire (see below for variations).
8. Preheat your oven to about 150 degrees (no higher as you will cook the fruit rather than dry it). Note: below is an option if your fruit leather dries too long that is really good.
9. Put your baking sheet in the oven and prop the oven door open. The drying is going to take a long while … the time depends on how much moisture is in your puree.
10. Remove the leather from the sheet while it is still warm and roll it up. Or, before you roll it up you could spread a filling on the leather and then roll it, this makes for a great variation and suggestions can be found below.


STORAGE: For very short term storage of about a week, cut the rolled leather into bite sized pieces, lightly dust with cornstarch, and wrap in plastic wrap. And then store the plastic wrapped bites in air tight storage containers. Store in a cool, dry, dark place such as a pantry. For longer storage, store the prepared bite-sized rolls in air tight storage containers and store in refrigerator or freezer. Rolls that contain nuts or coconut need to be stored in the freezer.


FRUIT LEATHER CHIPS: If your fruit leather dried too long it may become brittle and crack as you try to peel it off the baking sheet. Don’t despair about wasted effort and wasted fruit … this can be turned into a good thing! You can crush this and use it as toppings for ice cream, yogurt, milk shakes, or hot breakfast cereals … even cold breakfast cereals get a tasty boost from this. These chips can also be reconstituted and used as baby food or in baby cereal … just make sure that you’ve soaked or crushed the chips enough so that there are no sharp edges left.


VARIATIONS: Spices – allspice, cinnamon, cloves, coriander, ginger, mace, mint, nutmeg, pumpkin or apple pie spice blends.Flavorings – almond extract, lemon extract or juice or peel, lime juice or peel, orange extract or juice or peel, vanilla flavoring, etc.Garnishes – shredded coconut, chopped dates, chopped dried fruit, granola, miniature marshmallows, chopped nuts, chopped raisins, sunflower or poppy or sesame seeds, etc.Fillings – melted chocolate, softened cream cheese, processed cheese spreads, fruit fillings made from jams or jellies, marmalade, marshmallow cream, peanut butter, etc.

*I’ve given you directions for drying fruit in an oven; however, you can sun dry fruit as well (just figure out a way to keep the insects off of it until it is completely dried. Or, you can use a dehydrator. Not too long ago, people would get these as wedding gifts as often as they used to get fondue pots. You can sometimes find these at yard sales when people get tired of them taking up cabinet space. I have one myself and have found it very useful that was inexpensively purchased from a major discount store chain. The plus of using a dehydrator is that your foods will dry quicker thereby retaining more nutrients … and you are less likely to over dry them.

Thursday, August 2, 2007

Raspberry Jam

The berries - we bought a box of 6 little boxes - just over $6.00


Photo Sharing and Video Hosting at Photobucket
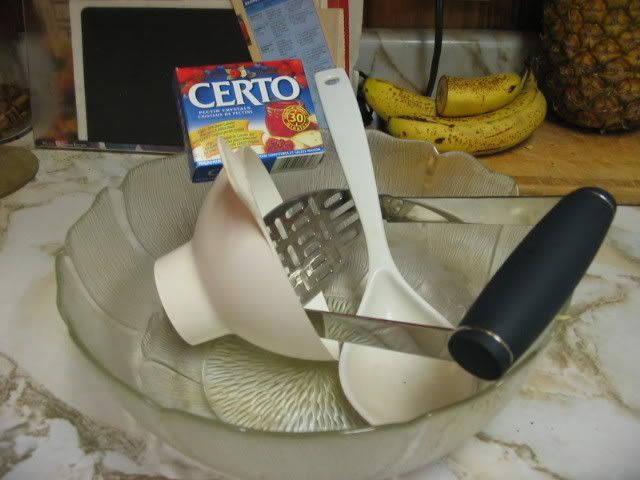
All the tools and Certo, ready to go

Photo Sharing and Video Hosting at Photobucket


Sugar, measuring cups all handy

Photo Sharing and Video Hosting at Photobucket


Exactly 4 cups of crushed berries

Photo Sharing and Video Hosting at Photobucket


Add[mixed] the Certo and ¼ sugar, let sit 30 minutes

Photo Sharing and Video Hosting at Photobucket


Then add 3 cups of sugar and stir for 3 minutes

Photo Sharing and Video Hosting at Photobucket


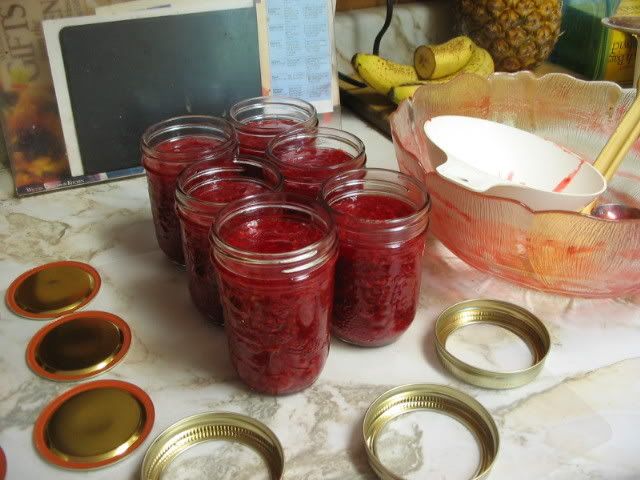
Carefully, using a special funnel, fill 6 jars

Photo Sharing and Video Hosting at Photobucket


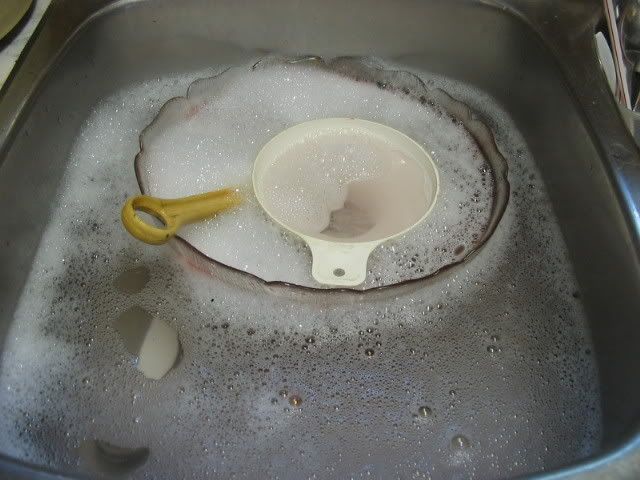
Wash-up as you go

Photo Sharing and Video Hosting at Photobucket


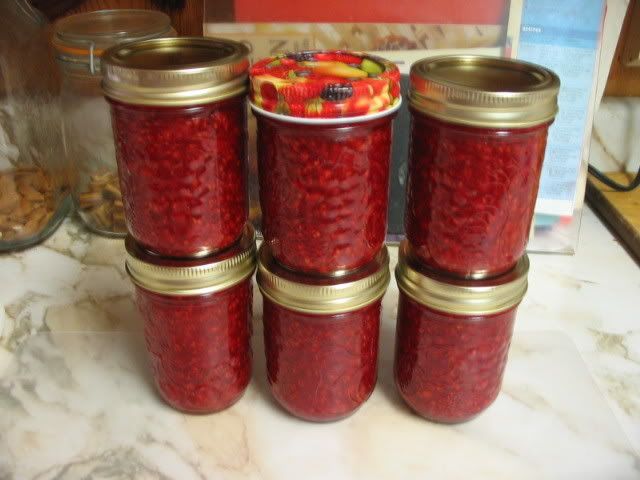
Result, 6 jars of yummy raspberry jam to freeze and give away

Photo Sharing and Video Hosting at Photobucket
Having Jam on my toast tomorrow

Tuesday, July 17, 2007

Twice Baked Potatoes

Alright, first off, you need to bake your potatoes the first time. Clean you potatoes well, poke holes in them, and then bake them. Baking times and temps may vary but I bake at 350 for about an hour and a half.


When they are done baking, pull them out of the oven and allow them to cool for a few minutes.


When they have cooled enough that you can bare to touch them, cut a hole in the top. Be sure not to cut too deep.


Peel off the potato skin and scoop out the insides into a bowl.


Add milk, butter, salt and pepper to taste, as though you were making mashed potatoes. You don't want it too runny, though. Go for creamy, yet a little thick.


Mix well with a hand mixer, or however you do it. I really don't know any other way to do it, but I'm sure there's some tribe in Africa that mashes their potatoes some other way...


When the potatoes taste right, add cheese and mix it again. This is the best part!


Then scoop the mixture back into the potato skins, ever so carefully. If the skins ripped, it's ok, this mixture kind of sticks things back together...


Then top with cheese and back into the oven again. The temp and time depend on what else you've got cooking. This can go in and cook along with anything. Just watch it until the cheese is melted and beautiful...


And if you are under 2, this is how you eat it..."Show me how the piggies eat..."


Tuesday, July 10, 2007

Biscuits


OK - for those who wanna try making your own here is a classic recipe. No need to use a muffin.


Biscuits Ingredients:


Two cups of flour

1 tablespoon of baking powder

1 teaspoon of sugar (can add more to taste)

1/2 teaspoon of salt

1 stick of butter, cold (8 tablespoons)

3/4 cup of buttermilk, cream or half-and-half


Method:Preheat the oven to 450 degrees.

Mix all the dry ingredients together. Cut the stick of butter into pieces, and work into the flour mixture with your hands or a pastry blender until it resembles pea-sized crumbs. Add the liquid, mixing until a bit loose and sticky. Pour dough out on a floured surface, and knead for a minute. Dough should be smooth and no longer wet.

You can sprinkle more flour on the surface if you find it’s sticking. Take dough into a ball, and hit it with a rolling pin, turning it and folding it in half every few whacks. Do this for a couple of minutes.

Roll out dough until it’s 1/4 of an inch thick, and then fold it in half. Using a round cutter (can use a glass or a cup if don’t have a biscuit cutter) cut out your biscuits from folded dough. Place on a greased baking sheet close together (so they rise up not out), and bake for 15 minutes or until the tops are golden brown.Makes 10-12 biscuits.
If you don’t want to roll and cut them out, after kneading and beating the dough you can drop the dough onto the baking sheet with a spoon. They’re not as symmetrical (dropped biscuits are also known as cat head biscuits) but they’re no less delicious.

Monday, July 9, 2007

Golden Rod Eggs

This is my ultimate comfort food-and all the pictures are mine! This was a favorite breakfast item from my childhood, that I just figured out how to integrate it into my dinner menu, cause that's how I roll...

First you need to get some eggs boiling. The number depends on how many you are feeding and how big their appetites are. In my family of 4, I cook 4 eggs. Most people know how to hard boil eggs, but for those with questions, I boil for 15 minutes. Works every time.


Next you need to get your biscuits in the oven. The eggs and the biscuits take the longest to cook. I cheat and use the store bought, put in the oven kind...

(Watch out they POP!)


For you over achievers, I'm sure you can make biscuits homemade, you just won't find those instructions here...

Next we'll work on the gravy. I cheat here too. I know that white gravy is simple to make, but I've never mastered gravy at all, so when my sister told me about packets you can buy, I'm thinking why not...


You do have to be sure to stir well, so you don't burn the bottom and I do add salt and pepper to taste. When I was done with it, it tasted just like my dad used to make...


Next after checking that your biscuits aren't burning, your eggs should be done. When they are, after enough time has elapsed, run cold water over them so you can shell them. When you shell them, separate the yolk into a bowl, and the whites get cut up and mixed unto the gravy.


Smash up yolks with a fork and get cheese. As I've admitted a few times I'm a cheater, I buy my cheese already grated, if this isn't the case at your house, then you've got more work to do...


Now comes the best part of all and that's assembly... Take a biscuit, split it in half and set it on your plate. Put some gravy on each side. Put some cheese on that, and sprinkle some egg yolk on that, and you get the finished product...


My husband said this was the happiest I've looked at dinner time in a long time...