These French bread baguette recipes will make you feel like you've stepped into a French bakery. Delicious, authentic, and easy to make!
Preparation Time: about 25 minutes
Cooking Time: about 25 minutes
Resting Time: about 4 hours, 30 minutes
Ingredients for French bread baguette recipes:
4 cups Flour
1 tbsp. Dry Active Yeast
1-2 tsp. Salt
2 cups Warm Water
Oil for bowl
How to make it:
1. In a bowl, mix together the flour and the salt.
2. In another bowl, combine yeast, warm water, and half of the flour/salt mixture. Using your hands, mix until it forms a dough. Then, cover with a dish cloth and let sit at room temperature for 3 hours. It should triple in size.
3. Gently incorporate the rest of the flour/salt, using your hands.
4. Place on a lightly floured surface and knead for about 10 minutes. It should be supple and elastic when you stop kneading.
5. Lightly oil a bowl. Place dough in bowl. Cover with a dish towel. Let sit for 1 hour. It should double in size.
6. Preheat oven to 450°F. Knead again. Then cut dough into 3 parts and form each part into a long baguette. Place on a baking sheet. Let sit for at least 20 minutes.
7. Place a bowl of water in the oven. Bake baguettes for about 25 minutes (maybe less). Remove the bowl of water after 15 minutes of baking.
VoilĂ !
Tip for French Bread Baguette Recipes:
Baguettes are particularly crusty and light because they are cooked at extremely high temperatures and are vaporized. Even though domestic ovens can't go as high a real French bakery ovens, you can still make an excellent baguette, by remembering to put a bowl of water in the oven. And, of course by baking at a very high temperature.
Variations:
Do you like whole wheat baguette recipes? Just use 1 cup White flour and 3 cups Whole Wheat flour!
Serving Ideas:
French bread baguette recipes can be used in a variety of ways: for breadfast with butter and jam, to accompany soups, for sandwiches, cut in thin slices for foie gras, to serve hors d'oeuvres… or really with anything at all because French bread baguette recipes are just so delicious!!!
Wednesday, May 30, 2007
Lamingtons
There are many stories about why they are called what they are but they are still Lamingtons.Some of the current dictionaries say that they are probably named after Charles Wallace Baillie, Lord Lamington, who was governor of Queensland 1895 - 1901
For many years lamingtons were served on state ceremonial occasions in Queensland and won universal approval. But Baron Lamington himself could by no means abide them. He invariably—and somewhat oddly—referred to them as ‘those bloody poofy woolly biscuits’
Do not under any circumstances say that Lamingtons are made with stale cake ,the ladies from the Women’s Guild get mightily upset if you say their Lamingtons are stale , they aren’t stale they just work better if the cake is a day old and taste better if they are mature
Lamingtons Recipe
Ingredients
1 slab sponge cake (one day old)
4 cups icing sugar
1/3 cup unsweetened cocoa powder
2 tablespoons butter
1/2 cup milk
2 - 3 cups desiccated coconut
To make the icing
Cool the cake for at least half an hour in the Fridge or Freezer then cut into squares or fingers
Combine the Sugar and Cocoa in a large bowl
Heat the milk and butter in a saucepan until the butter is melted.
Add to the sugar/cocoa mixture and mix to a fluid yet not runny consistency
To put it all together
Make a production line of Sponge Fingers, Chocolate Icing mixture in a bowl, coconut in a shallow container or plate, and a cooling rack with paper underneath.
Using a fork dip the sponge fingers into the icing, roll it in the coconut covering it well, and then place on to the rack to dry.
Once they have dried, place in an airtight container and leave to "mature" for at least a few hours, preferably overnight, before eating.
Pavlova
So being the sweet person that I am (don’t believe that coz I don’t) and to continue the Australiana stuff here’s a post about Pavlovas.
Pavlovas of course are the main thing at any function in Australia no wedding, no fete, no school function even Tupperware party is complete without the obligatory Pav.
I actually dislike Pavs cant stand the meringue part but I will eat the fruit off the top and the cream.
Background on Pavlovas
In the 1930's an Australian chef, Herbert Sachse, invented this dessert when a soft meringue cake was requested for an afternoon tea at the hotel where he worked. This meringue cake, with its unusual soft sweet marshmallow center and crisp crust is produced by folding a little vinegar and cornstarch (corn flour) into the stiffly beaten egg whites and sugar. Once the Pavlova has been baked and cooled, softly whipped cream and fresh fruit (kiwi (fruit), raspberries, strawberries or passion fruit) are mounded in the center of the cake. The name, Pavlova, was chosen in honor of the Russian ballerina, Anna Pavlova, who visited Australia in the 1920s. Although Australia is credited with inventing this dessert, New Zealand also lays claim to it as a similar dessert was being served in that country around the same time
A little known fact about Anna Pavlova, apart from having a dessert named after her also stopped clocks from striking. During her visit to Adelaide she complained that the Adelaide town hall clock striking the hour was keeping her awake, so the clock was stopped from striking the hour between 9pm and 9 am it remained that way till the year 2000 when it finally struck midnight to bring in the millennium, the first time it had struck 12 since her visit 80 years earlier. If you think about it Y2K actually fixed the clock if it hadn’t been the year 2000 it probably would have remained silent.
Pavlova Recipe
Preheat oven to 250 degrees F (130 degrees C) and place rack in center of oven. Line a baking sheet with parchment paper and draw a 7 inch (18 cm) circle on the paper.
In the bowl of your electric mixer, with the whisk attachment beat the egg whites on medium-high speed until they hold soft peaks. Start adding the sugar, a tablespoon at a time, and continue to beat until the meringue holds very stiff peaks .The meringue should feel smooth, not gritty. If it feels gritty the sugar has not fully dissolved so keep beating until it feels smooth between your fingers). Sprinkle the vinegar and cornstarch over the top of the meringue and, with a rubber spatula, fold in.
Gently spread the meringue inside the circle drawn on the parchment paper, smoothing the edges, making sure the edges of the meringue are slightly higher than the center. (You want a slight well in the center of the meringue to place the whipped cream and fruit.)
Bake for 1 hour 15 minutes or until the outside is dry and takes on a very pale cream color. Turn the oven off, leave the door slightly ajar, and let the meringue cool completely in the oven. (The outside of the meringue will feel firm to the touch, if gently pressed, but as it cools you will get a little cracking and you will see that the inside is soft and marshmallowy.)
The cooled meringue can be made and stored in a cool dry place, in an airtight container, for a few days.
Just before serving gently place the meringue onto a serving plate. Whip the cream in your electric mixer, with the whisk attachment, until soft peaks form. Sweeten with the sugar and vanilla and then mound the softly whipped cream into the center of the meringue.
Arrange the fruit randomly, or in a decorative pattern, on top of the cream. Serve immediately as this dessert does not hold for more than a few hours
Obviously these are not my pictures ...
I don't realy like pav, made it but I won't eat it
Tuesday, May 29, 2007
French Toast
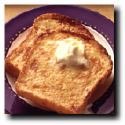
I love French Toast. At my house we make it for breakfast, lunch or dinner. It really doesn't matter. Now, I'll be the first to admit, that's not my pic up there, but that's what they look like.
Ingredients:
Eggs
Vanilla
Cinnamon
Nutmeg
Bread
Preheat your pan or griddle. I personally use a griddle, because you can cook more at once. Don't forget your non-stick spray!
The amount of eggs depends on how many you are cooking for. The rule of thumb I live by is that it takes 1 egg for 2 pieces of bread. It's pretty accurate. Crack your eggs into a bowl that's big enough for a piece of bread to lay flat in. Add about a teaspoon of vanilla, a few shakes of nutmeg, and cinnamon. I wish it was more technical than that, but it's not. You know you've got enough, if it smells good. Beat the eggs, and spices together.
Take your bread and dip them in egg mixture on both sides until well coated. Place your bread on your griddle or pan and let it cook until the side down is golden brown, then flip. When both sides are fully cooked, it's done.
I usually serve this topped lightly with butter and maple syrup, with fried eggs. Yum!
Saturday, May 26, 2007
Shepherds Pie
This is one of the first things I ever learned to cook, its warm and filling and it doesn’t really matter what you add to the basic recipe
Ingredients
500g minced lean beef (ground beef)
1 onion diced
1 tbsp oil
1 teaspoon minced garlic
1-tablespoon gravy powder
6 medium sized potatoes (mashed)
Handful of grated cheese
Peel then cut potatoes into small pieces medium sized saucepan let them cook as you prepare rest of pie
Brown mince and onion add gravy power stir add water to thin down
Transfer mixture into large flat casserole dish
Mash potatoes and place them over the meat
Cover with handful of grated cheese
Bake in hot oven or under the grill till cheese is brown
Serve
You can replace potatoes with pasta and/or add any diced vegetables or even beans to this basic recipe even add tomatoes and chilli instead of gravy for a Mexican pie
Lemonade Scones
In Australia scones are served at functions (tupperware parties, the Queens visit etc.) with cream and jam. These are a little different to the normal plain scones Lemonade Scones are sweet, so are better with only butter or cheese
Ingredients
Hot oven!
Ingredients
Hot oven!
3 cups Self Raising Flour
1 cup Cream
1 cup of Lemonade (clear fizzy kind)
1 cup Cream
1 cup of Lemonade (clear fizzy kind)
Add cream to flour in a large mixing bowl and stir adding lemonade slowly
when mixture gets to hard to stir get your hand in and knead it but only gently
Place mixture on floured board and cut out round circles with a small cutter.
when mixture gets to hard to stir get your hand in and knead it but only gently
Place mixture on floured board and cut out round circles with a small cutter.
Place on oven tray
Brush tops of scones with a small amount of milk
Bake for 10 to 15 minutes in a hot oven (250 at least)
Scones should rise and double in size if they don’t and are rock hard the oven wasn’t hot enough
When cool place in airtight container, remember scones will go hard after 24 hours so must be eaten on the same day.
Of course I'm a chucker just chuck it in and I use European measurements as well
but basically a cup is a tea cup the little finger out size tea cup and a hot oven is as high as you can get the thing without it catching fire.
Friday, May 25, 2007
Taste Buds now open!
Missy A sent me an email from Down Under that titled Nutty Idea and it said this.
"I just had this crazy nutty idea
you know how you can have another blogger right weeeeeellllll
If I made a cooking one for recipies and made it so others could post under the permissions thingy like you and Webby and Alissa anyone else we can think of who has a blogger and cooks, then everyone can post on it then
They don't even have to sign in it comes up on the dashboard when they sign into thiers."
I was like OMG that is awesome!
What a wonderful idea.
A bunch of us virtually signing into to recipe sharing.
So maybe I can't get togther with Missy A for a shrimp on the barbie and a Foster's, but we van get together and share the one thing that makes people connect, makes people smile and makes everyone happy.
Food.
Like Emeril says "It's the love of food and food of love. Yeah baby."
So, I am not sure how Missy A adds people but please let us know in the comment section here if you would like to be added. I am able to post this just by signing into my blogger. I have so many ideas I think I would like to continue with Iron Chef here.
So thanks to Missy A, we now have a place to gather, share a recipe or two and celebrate our love for food.
Cheers,
-Dana for Taste Buds For Life
Subscribe to:
Posts (Atom)